Hi everyone,
just wanted to share with you a small mod I did lately..
Basically, the context was that although being very happy with my F800GT I condider the original kighting system to be very average.
I decided to improve it and I initially fell in the trap of trying "white" halogen bulbs which were barely better that the stock bulbs. This was clearly just an expensive bandaid type fix.
I needed to achieve two goals:
First, an overall light quantity increase to spread the beam further and potentially wider
Second a color temp shift towards a white light to help being noticed by other road users, in the lane filtering context in particular.
So I decided to try some LED H7 bulbs such as these:
![]()
![]()
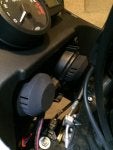
They come with a ballast, an optional can bus error filter, and the harness. They feature an internal heat sink and a high speed fan to cool them down. The whole system is waterproof and nicely manufactured.
I ordered them in H7 format which is what is mounted on the F800GT as stock. The LED bulb flange is 100% identical as the stock H7 bulbs.
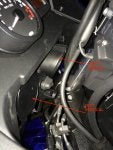
Upon reception, I mounted them in the headlight block, but I struggled a bit to clamp the spring wire retainer, as the LED bulb base is bulky. It carries the fan and the heat sink to there is a recess between the flange and the housing to clear the spring retainer, but not much. I used a small plier and after 5mn of struggle I finally locked them in place.
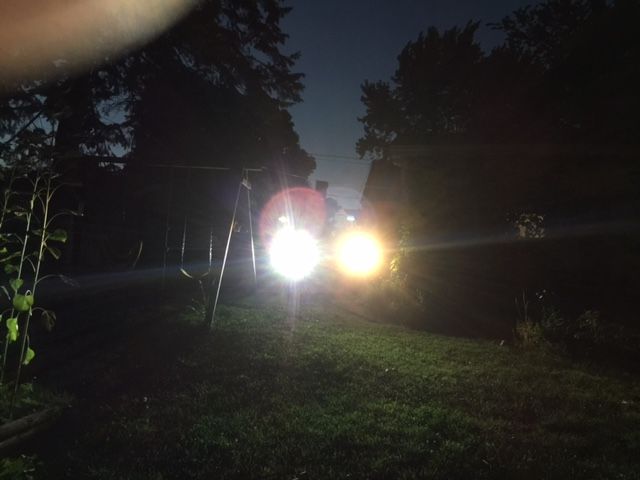
I connected them without the CAN bus error filter and I worked perfectly with a HUGE amount of light available. This is a chalk and cheese difference. There is no way I'm switching back to a halogen bulb, ever, period.
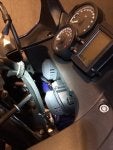
Now, since the back end of these bulb is more prominent that the stock halogen bulbs, I noticed that I can't put the lids back in place. See this picture about the stock lids:
![]()
So I designed a pair of lids that would snap into the headlight block in lieu of the stock lids. Those would carry a emboss to clear the bulb back end, while being rain proof and providing the required venting, and cable clearance. I used Solidworks to create two digital models of the parts:
![]()
![]()
![]()
![]()
As you can see the right side is a bit different as it has to accommodate an existing 23° angle. The depth of each of them was defined based on the required clearance of the LED Bulb back end and the full left / right fork end point.
I then 3D-printed them online using selective laser sintering and got them in my mail 10 days later
![]()
![]()
They fit perfectly and give a nice industrial finish to the modification.
I use this config for about 6 weeks now and it went thru rain, cleaning, sun and wind without any issue so war.
I even changed the parking light for a led bulb to match the color temp and style; found a 5€ led bulb that did the trick and matched spot on.
Next step: a new SC project muffler on my GT in about 10 days, can't wait!
I hope this experiment may inspire some users to switch the LED lights, this is just fantastic!
Cheers,
Remi
just wanted to share with you a small mod I did lately..
Basically, the context was that although being very happy with my F800GT I condider the original kighting system to be very average.
I decided to improve it and I initially fell in the trap of trying "white" halogen bulbs which were barely better that the stock bulbs. This was clearly just an expensive bandaid type fix.
I needed to achieve two goals:
First, an overall light quantity increase to spread the beam further and potentially wider
Second a color temp shift towards a white light to help being noticed by other road users, in the lane filtering context in particular.
So I decided to try some LED H7 bulbs such as these:


They come with a ballast, an optional can bus error filter, and the harness. They feature an internal heat sink and a high speed fan to cool them down. The whole system is waterproof and nicely manufactured.
I ordered them in H7 format which is what is mounted on the F800GT as stock. The LED bulb flange is 100% identical as the stock H7 bulbs.
Upon reception, I mounted them in the headlight block, but I struggled a bit to clamp the spring wire retainer, as the LED bulb base is bulky. It carries the fan and the heat sink to there is a recess between the flange and the housing to clear the spring retainer, but not much. I used a small plier and after 5mn of struggle I finally locked them in place.
I connected them without the CAN bus error filter and I worked perfectly with a HUGE amount of light available. This is a chalk and cheese difference. There is no way I'm switching back to a halogen bulb, ever, period.
Now, since the back end of these bulb is more prominent that the stock halogen bulbs, I noticed that I can't put the lids back in place. See this picture about the stock lids:

So I designed a pair of lids that would snap into the headlight block in lieu of the stock lids. Those would carry a emboss to clear the bulb back end, while being rain proof and providing the required venting, and cable clearance. I used Solidworks to create two digital models of the parts:


As you can see the right side is a bit different as it has to accommodate an existing 23° angle. The depth of each of them was defined based on the required clearance of the LED Bulb back end and the full left / right fork end point.
I then 3D-printed them online using selective laser sintering and got them in my mail 10 days later


They fit perfectly and give a nice industrial finish to the modification.
I use this config for about 6 weeks now and it went thru rain, cleaning, sun and wind without any issue so war.
I even changed the parking light for a led bulb to match the color temp and style; found a 5€ led bulb that did the trick and matched spot on.
Next step: a new SC project muffler on my GT in about 10 days, can't wait!
I hope this experiment may inspire some users to switch the LED lights, this is just fantastic!
Cheers,
Remi


